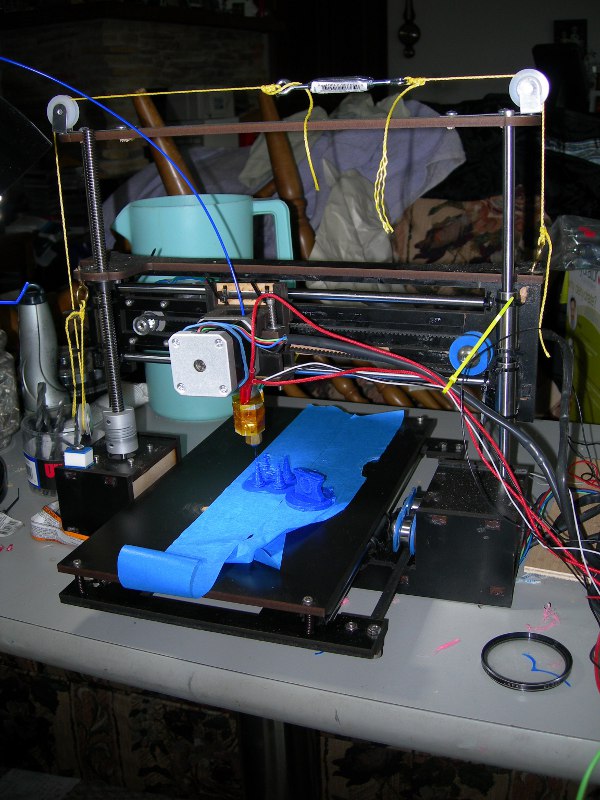
I don't recommend this printer in 2021, though in 2015, it wasn't a bad buy. But today it lackes for a very large number of reasons, but mainly, because prices have drastically dropped on entry level machines. So, note the jury rigged pulley system, for example, used to maintain z-axis level. It also needs an extruder fan (note threads in photo), and a heated bed (note the painter's tape to maintain adhesion, it works... sort of.) It's OK for experimenting and for parts to make other gadgets, i.e. laser cutter or CNC.
The Process
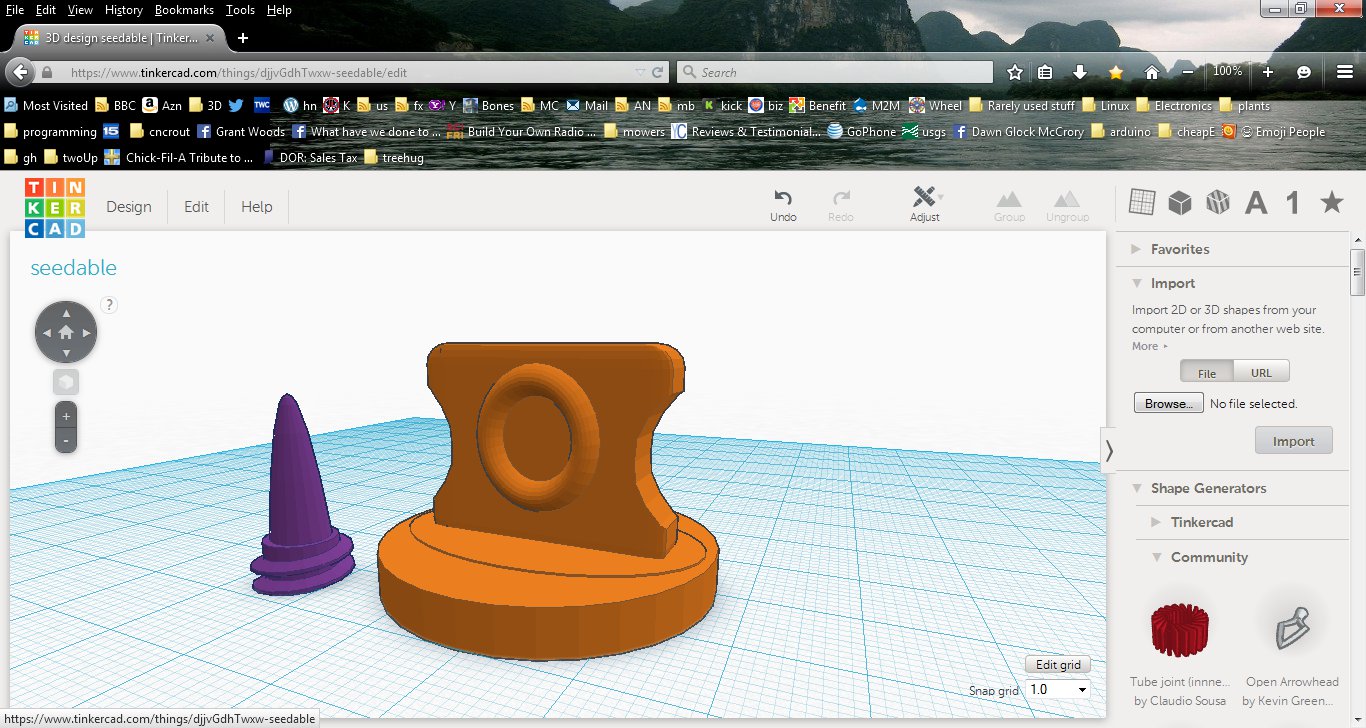
Step1- Lay out 3D structure inTinkercad, Autocad 123, etc.
(did not come with printer)
Step2- Import STL file into printer software or Slicer
In this case Repetier Software
(did not come with printer)
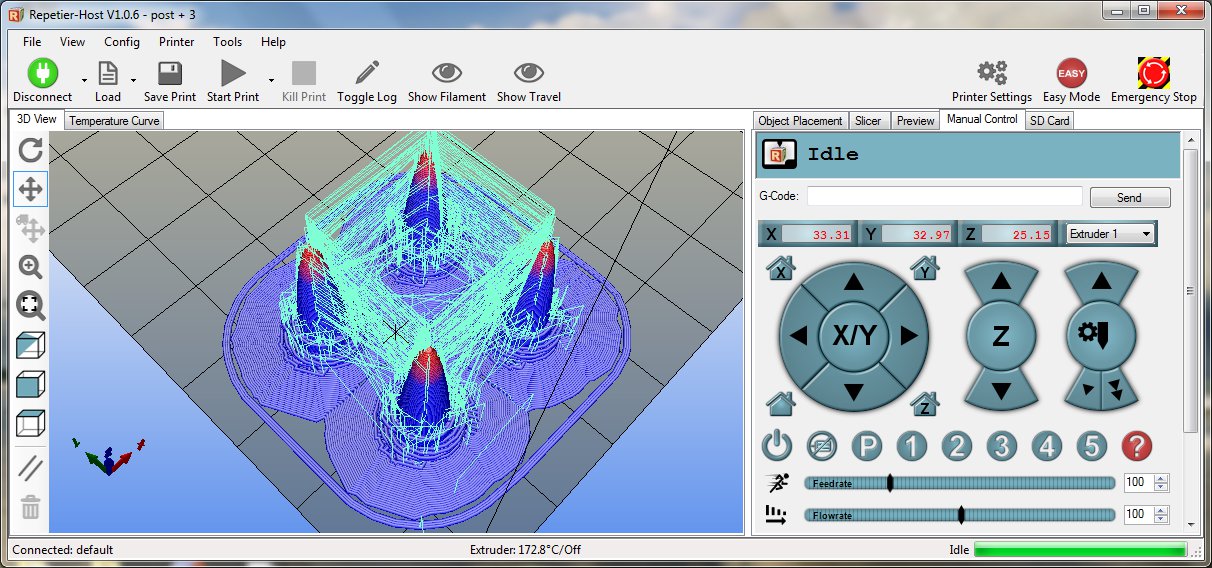
Step3- Slice, convert the structure into a series of G-code moves
Typical g-code file
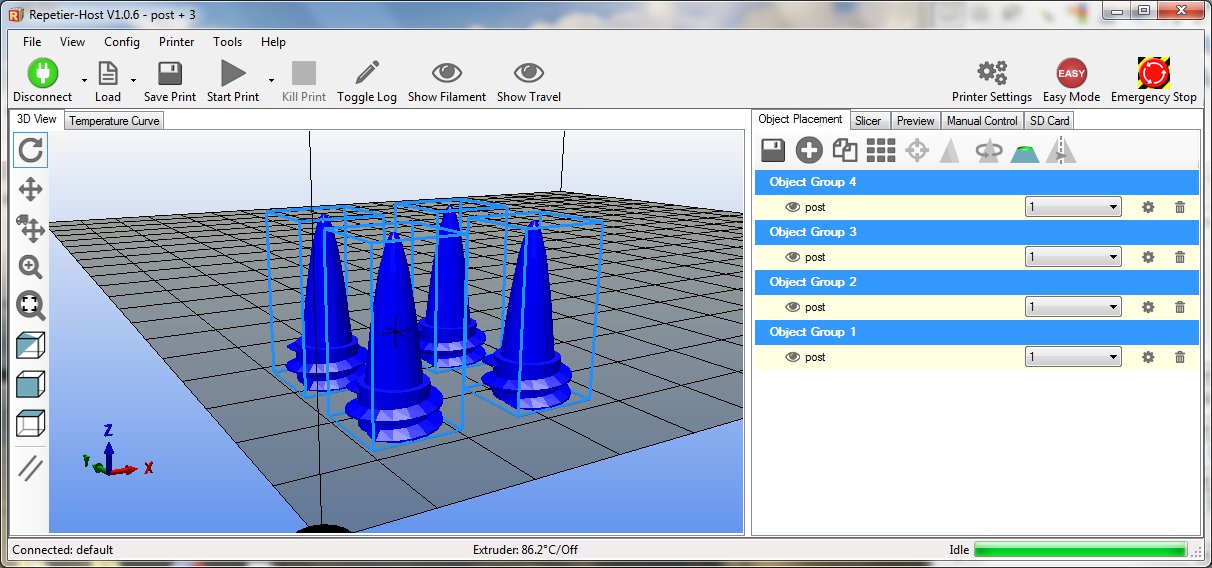
Step 4: Simulate the cut and examine the display:
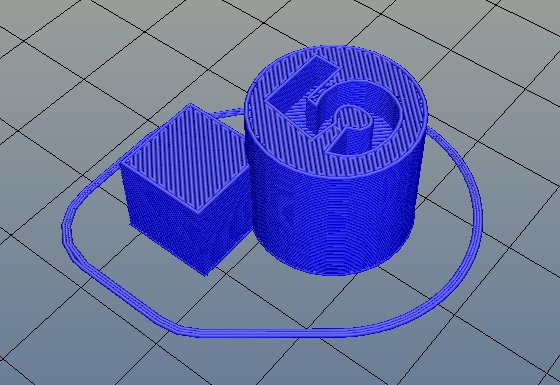
Here is a different part that actually printed quite well.
Step 5: Move the print head to the bed. Extrude a bit of plastic to prime the extruder.
Begin the extrusion. Note the display sim shows the stack is too too hot.
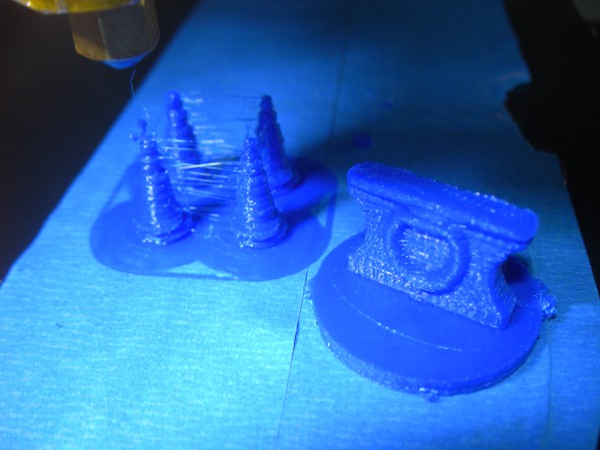
This is confirmed by the next picture which shows whiskers and stack shifts.
Here is the printed part, whiskers, stack shifts and all.
Next to it, on the right, is the second part of this construct made in a separate print,
note no whiskers or stack shifts on that part! Yea!!! Compare the finished product on the right
to the original model in tinkercad. The nozzle here is 0.4 mm wide and each layer is 0.2 mm
thick. Not shown here is the fan which I taped down to the bed and
removed before taking the picture.